

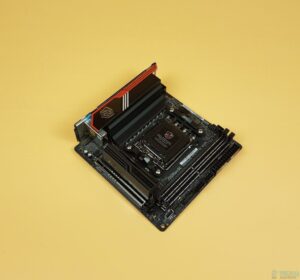
Picture this: the anticipation of an epic gaming session, the excitement building up, only to find your gaming motherboard refusing to power up. Frustrating, right? A non-responsive motherboard can be a major buzzkill for any gaming enthusiast. Fear not, though, as we’re about to embark on a journey to unravel the mysteries behind a gaming motherboard that won’t turn on. In this guide, we’ll walk you through step-by-step troubleshooting techniques and solutions, empowering you to revive your gaming rig and get back to the immersive world of gaming. Let’s dive into the realm of motherboard diagnostics and repair, ensuring that your gaming setup runs seamlessly once more.
How to fix a gaming motherboard that won’t turn on
Double-check the power outlet, ensuring it’s operational. Swap to a different outlet or try another electronic device to be certain. Sometimes, the solution is as simple as a reliable power connection:
Inspect Power Cables and Connections
Examine all power cables connected to your gaming motherboard. Make sure they are securely plugged into their respective slots. Pay close attention to the motherboard’s main power connector and the auxiliary power connectors. A loose connection can often be the culprit behind a non-starting motherboard.
Think of these cables as the lifelines of your gaming rig. Just like our devices need a consistent flow of energy, your motherboard relies on these cables for its power fix.
Best Budget Gaming Monitor for Xbox Series S
Isolate External Components
Unplug unnecessary peripherals such as external drives, USB devices, or additional cards. Sometimes, a conflict or malfunction in these external components can interfere with the motherboard’s startup process. Test your system with only the essential components connected to narrow down the issue.
Imagine your gaming rig as a busy highway. Too much traffic (extra peripherals) can lead to a bottleneck, causing delays (malfunction). Clearing the road allows for a smoother journey (troubleshooting).
Test with Alternative Devices
To rule out faulty hardware, try substituting your current power cables, power supply, or any other applicable component with known working alternatives. This process helps identify whether the issue lies with the motherboard itself or with an external component.
It’s akin to having spare parts in your toolkit. Just like having a spare tire in your car, having backup components ensures a quicker fix if one of them decides to act up.
By following these initial checks, you’re laying the groundwork for a systematic approach to pinpointing the cause of your gaming motherboard’s reluctance to power up. Now, let’s delve deeper into the heart of the troubleshooting process to revive your gaming rig.
Memory and CPU Troubleshooting
Reseating RAM Modules
Start by turning off your computer and disconnecting the power supply. Gently open your computer case and locate the RAM modules. Carefully release the clips on each side and remove the modules. Wipe the golden contacts with a clean, lint-free cloth to ensure a solid connection.
Think of reseating RAM like adjusting a snugly-fitted puzzle piece. Sometimes, all it takes is a little wiggle to make everything fit perfectly.
Testing with Alternative Memory
If reseating the RAM doesn’t do the trick, try swapping in known working RAM modules if available. This helps determine whether the issue lies with the RAM itself. If the system boots with the alternative memory, it’s a clear sign that your original RAM might be faulty.
Consider it a memory swap party. Just as friends share resources, your computer borrows a different set of memories for a while to see if that brings it back to life.
Best budget gaming monitor for laptop
Verifying CPU Installation and Thermal Paste
Inspect the CPU installation to ensure its snugly seated in its socket. If you notice any bent pins or irregularities, proceed with caution or seek professional assistance. Additionally, check the thermal paste between the CPU and the heatsink.
Dry or improperly applied thermal paste can lead to overheating issues.
Picture the CPU and heatsink as dance partners. For a smooth performance, they need to be in sync. If the dance floor (thermal paste) is messy or the partners aren’t holding hands (improperly seated CPU), the performance suffers.
By meticulously navigating through these memory and CPU troubleshooting steps, you’re not just fixing a malfunctioning motherboard – you’re engaging in a hands-on process to revive the heartbeat of your gaming rig. Now, let’s move forward with our journey to ensure a seamless gaming experience awaits you.
Power Button and Front Panel Connections
Begin by checking the power button on your computer case. Ensure it’s not physically damaged and that it presses down smoothly. Sometimes, a stuck or faulty power button can give the illusion of a non-responsive motherboard. If you spot any issues, consider cleaning or replacing the power button.
Think of the power button as the key to your gaming kingdom. Just like a well-maintained key opens doors effortlessly, a functioning power button initiates your gaming adventures smoothly.
Verify Front Panel Connections
Carefully examine the connections from your computer case’s front panel to the motherboard. Check the wires leading from the power button, reset button, and LED indicators. Ensure they are securely plugged into the corresponding pins on the motherboard.
A loose connection here can disrupt the signals needed to power up the system.
Imagine these connections as the intricate pathways in a secret garden. Each path (connection) leads to a unique feature. If any path is overgrown or obstructed (loose connection), the garden won’t reveal its wonders.
Reconnecting or Replacing Faulty Components
If you identify any loose connections or suspect a malfunctioning power button, carefully reconnect or replace the faulty components. It might require a bit of patience and attention to detail:
- Reconnect the wires according to your motherboard’s manual, ensuring the correct alignment.
- Consider this step as reuniting long-lost friends. Sometimes, all it takes is a heartfelt reunion (proper connection) to rekindle the magic between old companions.
- By focusing on the power button and front panel connections, you’re essentially refining the communication lines between you and your gaming rig.
- With each secure connection, you’re one step closer to resurrecting the heart of your gaming experience.
- Let’s persist on this journey to unveil the secrets of a fully functional gaming motherboard.
Advanced Techniques
For the daring troubleshooters seeking a deeper dive, grab a multimeter. Turn off your system and unplug it from the power source. Set the multimeter to DC voltage mode and carefully test the power supply outputs. Check for the proper voltages on the motherboard connectors. Abnormal readings could indicate a failing power supply.
Think of the multimeter as your detective’s magnifying glass. It helps you uncover hidden clues (voltage readings) that lead to the heart of the mystery (malfunctioning components).
Diagnostic Software Tools for Motherboard Analysis
Explore the digital realm with diagnostic software tools. There are various applications available that can analyze and report on your motherboard’s health. Install a reputable diagnostic tool, follow the instructions, and interpret the results. This can provide valuable insights into potential issues with your motherboard.
Imagine these tools as your motherboard’s personal physicians. They run tests, analyze symptoms, and provide a diagnostic report, guiding you towards the best treatment plan.
Seeking Professional Assistance If Necessary
Sometimes, even the most skilled troubleshooters need a helping hand. If your efforts haven’t yielded results, consider consulting with a professional technician or the manufacturer’s support. They have the expertise and tools to diagnose and address more complex motherboard issues.
Think of professionals as seasoned guides in your troubleshooting adventure. When the path gets tough, their knowledge serves as a compass, helping you navigate the trickiest terrain.
By delving into these advanced techniques, you’re taking the reins of a seasoned explorer, unraveling the motherboard’s mysteries. Whether it’s deciphering voltage signals or consulting digital physicians, these steps aim to equip you with the knowledge needed to conquer even the most elusive issues. Let’s press on, uncovering the final pieces of the puzzle to revive your gaming motherboard.
Graphics Card and Expansion Cards
Begin by turning off your computer and disconnecting the power supply. Gently inspect the connection between your graphics card (GPU) and the motherboard. Reseat the GPU, making sure it’s securely and evenly inserted into the PCI Express slot. A loose connection can be a common culprit for a non-responsive graphics card
Think of your graphics card as the artist in residence. It needs a secure studio space (PCI Express slot) to craft breathtaking visuals. A stable connection ensures a masterpiece every time.
Testing with an Alternative Graphics Card
If reseating the graphics card doesn’t yield results, consider testing with a known working alternative graphics card. This step helps determine whether the issue lies with the graphics card itself or another part of the system. If the system powers on with the alternative card, you might need to inspect or replace the original graphics card.
Picture this as a gallery swap. If one artist’s work isn’t lighting up the room (malfunctioning graphics card), swap it with another artist’s masterpiece (alternative graphics card) to keep the exhibition running smoothly.
Conclusion
In the quest to revive a gaming motherboard that refuses to power on, we’ve embarked on a troubleshooting journey, dissecting each component and unraveling the mysteries that hindered your gaming adventures. From initial checks to advanced techniques, you’ve become the architect of your gaming rig’s destiny.